Step 5: Copyright, Creative Commons and Images
The aim of this fifth activity is to:
- Discuss copyright and introduce Creative Commons.
- Explain how to find and add Creative Commons images to posts.
- Discuss free and public domain images.
- Add Creative Common or public domain images to your posts.
Its purpose is to explain copyright and how to find images online that you can use in blog posts.
Introduction to copyright and using images in posts
Adding images to your post can be an important tool for building interest and grabbing your reader’s attention.
But you can’t just use any image you like in a blog post.
Why? Because unless stated otherwise, the law automatically grants full “copyright” over any creative work a person makes.

Laws that apply to the use of copyright material in schools don’t apply to using the material on the Internet. Using copyright material in posts leaves you open to copyright infringement which is why it is important to learn which images you can use and how to attribute images you can use.
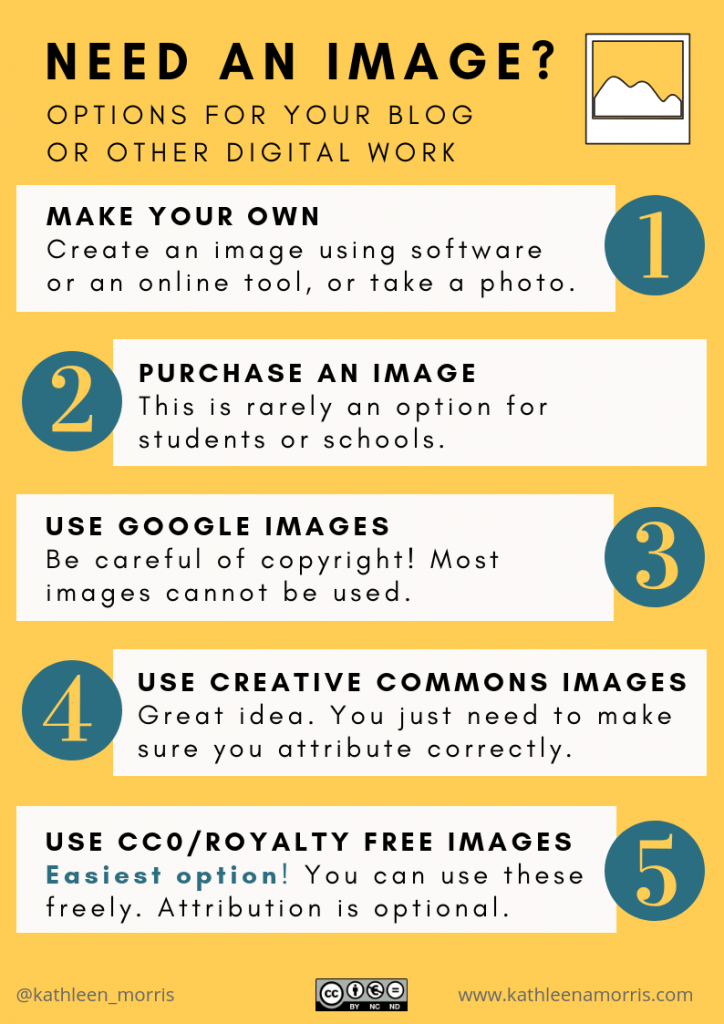
To avoid copyright issues you should use one of the following three options:
- Option 1: Use Creative Commons Images.
- Option 2: Use public domain images.
- Option 3: Use your own photos or use images you create using apps or online tools.
The same rules apply to audio and videos. For example, if you are creating your own video to share online and want to add music then you need to use either creative commons or public domain music.
For this activity, we will focus on finding images online that you are allowed to add to blog posts. Refer to step 4 if you want to upload your own photos or create your own photos.
Introduction to Creative Commons
Creative Commons is an organization that provides free content license known as a Creative Commons license that people can apply to their work.
When you license your work with creative commons, you are giving people permission to use it without having to ask permission, provided they use it in the manner stated in your Creative Commons license.
The reason people use Creative Commons licenses is to make it easier for everyone to share and adapt creative work without the concern of copyright infringement.
Watch this video on Creative Commons.
Creative Commons licenses are used for books, websites, blogs, photographs, films, videos, songs.
If an image, or website, doesn’t include a Creative Commons license, or isn’t public domain work, or doesn’t indicate that the content is free to use, then it is automatically implied that all content is copyright and you shouldn’t use it! Put simply — unless stated otherwise, it is copyright.
Finding Creative Commons Images
It’s a requirement of all Creative Commons Licenses that you attribute the original author. This means you can’t just use a Creative Commons image without acknowledging the person who originally created it and often it also requires you to distribute the image under the same license.
Within or at the end of your blog post you must attribute the image, include their copyright information and you should link the photo back to its original photo page.
Where can I find images for my blog posts?
When you’re looking for images for your blog posts and pages, you have 5 main options.
Check out this post from Kathleen Morris’ blog for more detailed information and posters.
Free and public domain images
There are websites that provide public domain images that are free to use or have their own free-to-use licensing.
Public domain works are those works that:
- Automatically enter public domain when created because they are not copyrightable.
- Their copyright has expired.
- Their creator has assigned their work to public domain.
Public domain images are free and available for unrestricted use.
Attributing free and public domain images
Public domain images and free-to-use images may not have a strict legal requirement of attribution, however, it is appreciated by creators.
This means within or at the end of your blog post it is recommended to attribute the image, includes their copyright information, and link the photo back to its original photo page.
Useful websites for finding free photos
These don’t require attribution:
- Pixabay
- Unsplash
- Pexels
- Photos For Class (attribution is automatically included)
- Openclipart
- Pics 4 Learning
- Embed Getty Images (you can embed these with the attribution included)
These require you to check the Creative Commons license and attribute:
If you want to find out more about sites you can use that don’t require attribution, check out Kathleen Morris’ post.
The table below also explains the age restrictions associated with some sites.

Use The Pixabay Plugin To Add Creative Commons Images To Post
The Pixabay plugin is a quick and easy tool to find quality public domain images from Pixabay and upload them to your site with just one click. The images are filtered.
Below is an example of an image inserted using the Pixabay plugin.

Using The Pixabay Plugin
Once you have activated the Pixabay plugin in Plugins > All you use it as follows:
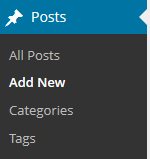
Go to Posts > Add New
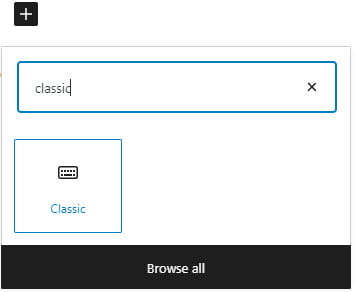
Add a Classic block where you want the image to be added.
To add a classic block you click on the + icon at the right of an empty block or at the top left, search for Classic and click on the Classic icon.
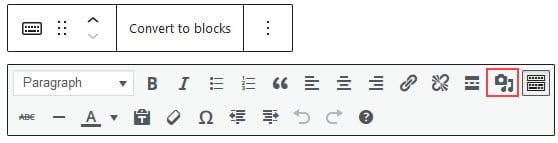
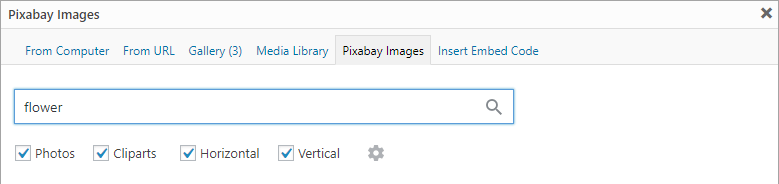
Now click on the Add Media icon and then select the Pixabay Tab in the Add Media window.
Add your search term and press enter.
Click on the image you want to insert into your post.

This uploads the image from Pixabay into your media library.
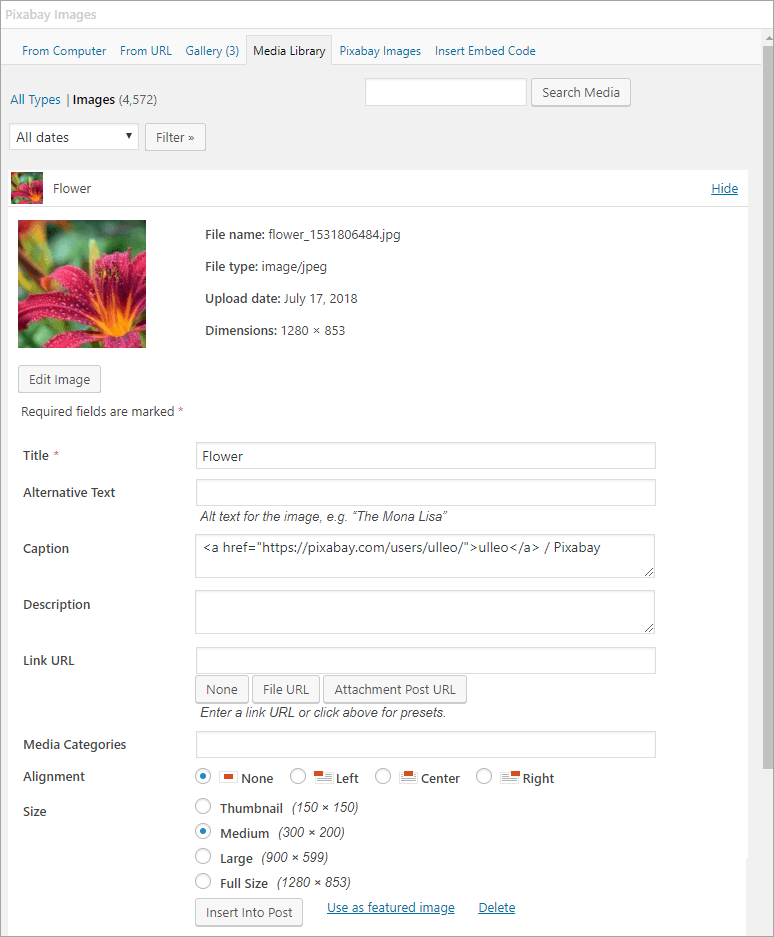
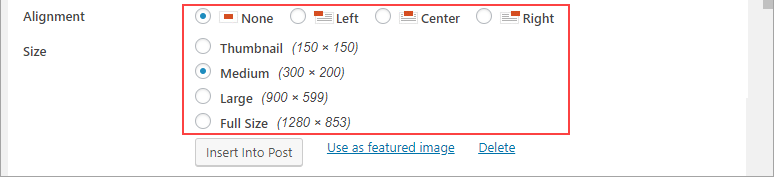
Select the Alignment, Size and then click Insert into post.
The image is added to the post with a link to the user who uploaded it to Pixabay.

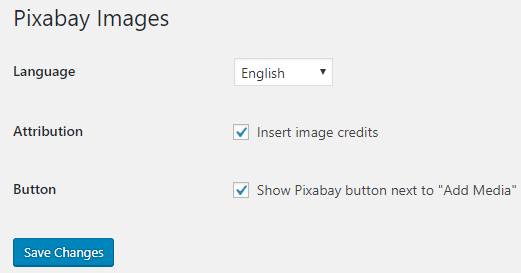
Pixabay Settings
You can change the Pixabay options in Settings > Pixabay. In most situations, you would not change these settings.
Add An Image From The Pixabay Website
Here is how to add an image from Pixabay if you don’t want to use the plugin (as described above).
Note that using the Pixabay website is for users 16+. A better option for young students is Photos For Class. The same process applies.
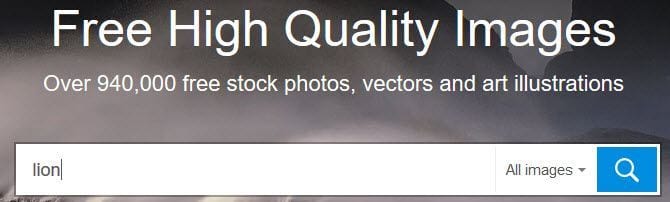
Go to Pixabay
Add your search term and press Enter.
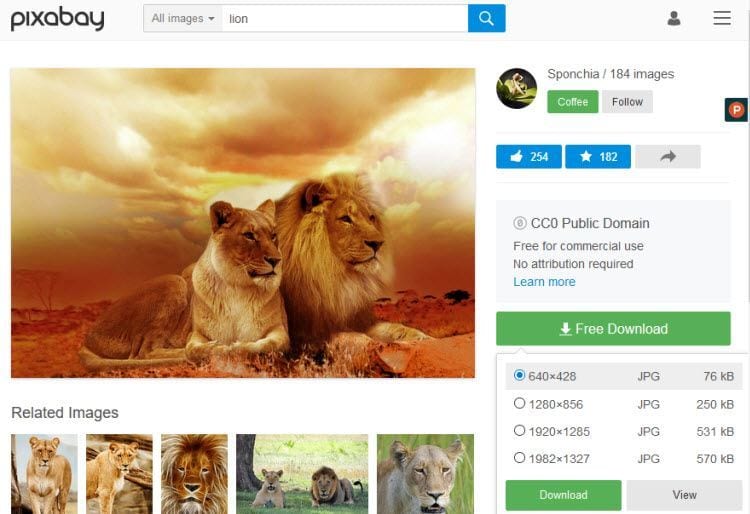
Click on the image you want to use (you can’t use any image in the sponsored images row).
This takes you to the image page.
Click on Free Download, select the size you want to download and then click Download.
Go to Posts > Add New.
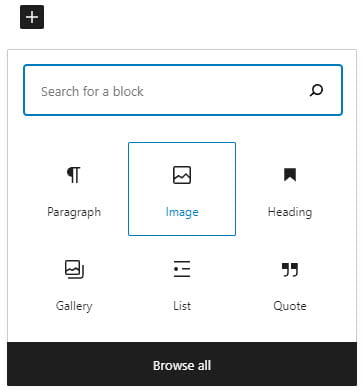
Add an image block where you want the image to be added.
To add a new block you click on the + icon at the right of an empty block or at the top left and click on the Image icon.
Click on Upload.
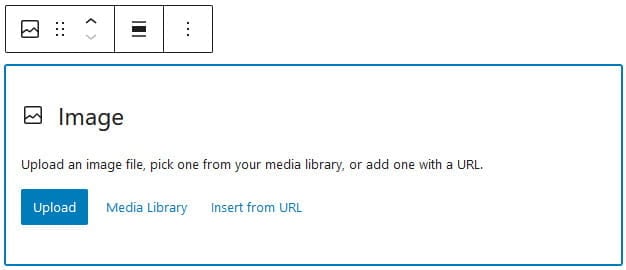
Select the photo on your computer that you want to upload and then click Open to start uploading the image.
Once the photo has been uploaded you will see options in the image block toolbar and image block settings in the editor sidebar where you can make adjustments to the image.
If you want several images to appear side by side you need to add using a gallery block.
Your Task
Complete one or more of the following tasks:
- Add a Creative Commons image or public domain image to a post and then share a link to your post by leaving a comment so we can see how you went. Ideas for your post could be to write a poem or story about the image.
- Research copyright, Creative Commons, and public domain then publish a post to share what you’ve learned about using images, music, or videos online.
- Leave a comment on this post and tell us how you went adding images to your post. Remember to leave a link to your post in your comment so we can have a look at your new post.