Step 3: Set up About Me page
The aim of this third activity is to:
- Help you understand how pages are used on blogs.
- Set up an About page on your blog.
Introduction to pages
Pages on blogs are used for information that you want to share with your readers but don’t expect to update frequently. The main points to remember are:
- Pages are best suited for information you rarely update such as your About page.
- Information you want to share with others, such as your interests or what you learned in class, or questions you want to ask readers are should be published as posts and not on a page.
What is an About page?
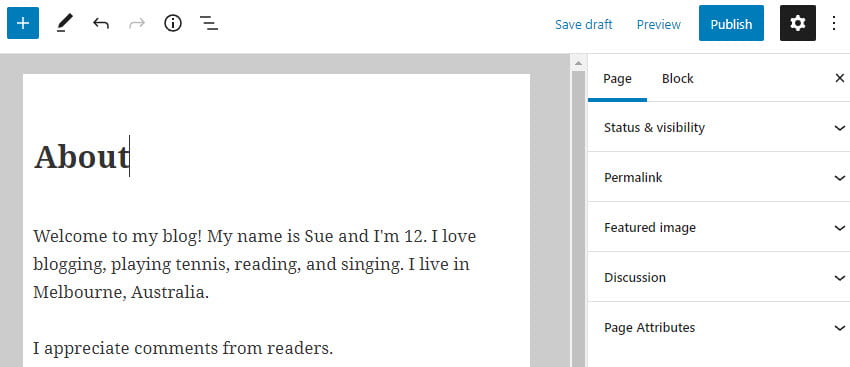
One of the first things a new visitor to your blog looks for is your ‘About’ page. Your ‘About’ page tells readers more about who is writing the blog posts. An ‘About’ page is like meeting someone for the first time — it is the way you introduce yourself to your readers. Does the person have a similar interest to me?
About Page ideas
About pages can be as simple or as creative as you would like. Check out these examples of About pages for ideas:
- Evelyn’s About Page
- Jodie’s About Page
Creative ideas for your About page include:
- Write a post about yourself.
- Write an A-Z About page such as I am an athletic, yet brainy child who decided that saving the environment is one of my future goals.
- Create a list of things that people may not know about you.
Create your About page
Go to Pages > Add New.

Give your Page a title and click Save Draft.
Add your About information and click Publish when finished. You need to click on Submit for Review after clicking Publish if your teacher has settings configured to check all posts and pages before they are published.
Remember to be Internet safe.
Don’t include any birth dates, phone numbers, any personal information like your last name, your street address, or your school name.
Tell your readers about your interests without providing any personal or identifying information.
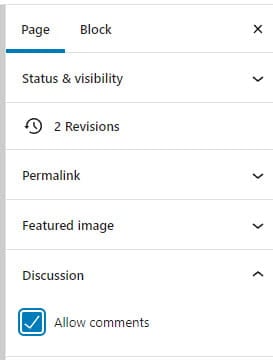
By default, comments are disabled on pages. If you would like your readers to be able to leave comments on your About page you enable by clicking on the discussion in the document settings.
Click on Page to access the document settings options. Click on the Settings icon next to the Publish/Update button if you don’t see the editor sidebar.

Select Allow comments and click Publish or Update.
Block Editor Overview
The area where you write your pages and posts uses a block editor. You add content to your post or page using a block. Different blocks are used for adding paragraphs, images, galleries, videos, lists, tables, and more. You will find a complete list of all the different block types here.
Watch the following video to see how the block editor uses blocks to create posts and pages.
By default, the block underneath the post/page title is a paragraph block that you use for regular text and is designed to allow you to start writing straight away.
To add a new block you click on the + icon at the right of an empty block or at the top left.

Then click on the block for the type of content you want to add. For example, if you wanted to add a photo you would click on the Image icon or if you wanted to add a photo gallery you would click on the Gallery icon.
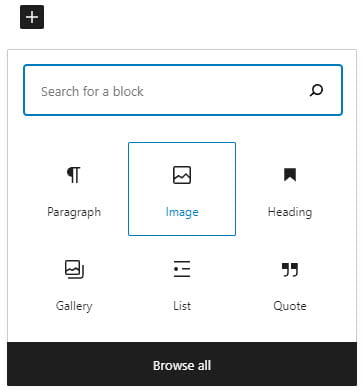
Each block type has options for adding that type of content. For example, when you add an image block you click on Upload or Media Library to add your image.
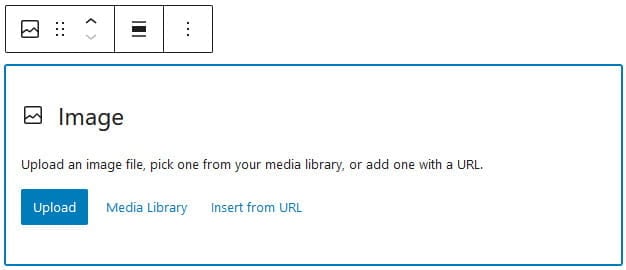
Upload lets you upload an image from your device while Media Library is used to select an image you’ve already uploaded to your site’s media library.
Once your image has been uploaded you can add the caption (optional).
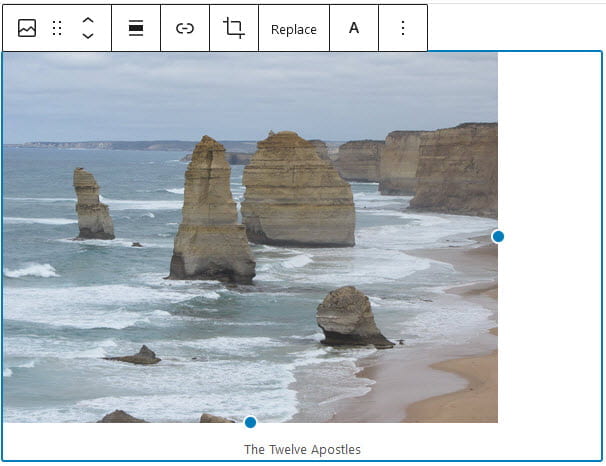
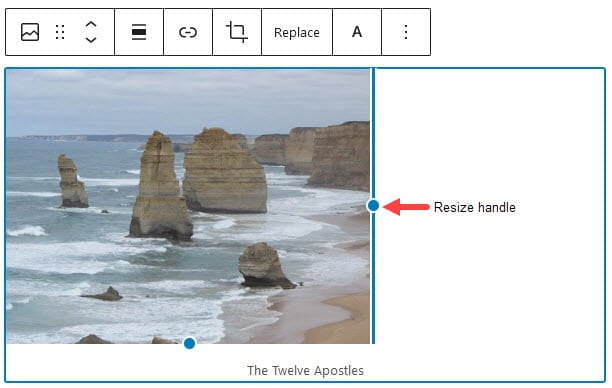
You can resize the image using the resize handles. Click on the resize handle and drag the image to your desired size.
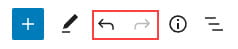
At the top of the block editor, there is an option to undo or redo.
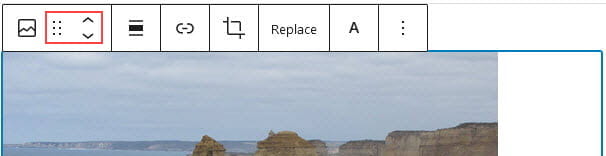
You move a block up or down by dragging the block around by clicking and holding the six-dot-grid near the top left corner of the block toolbar or use the up and down arrow to move the block in the direction you want.
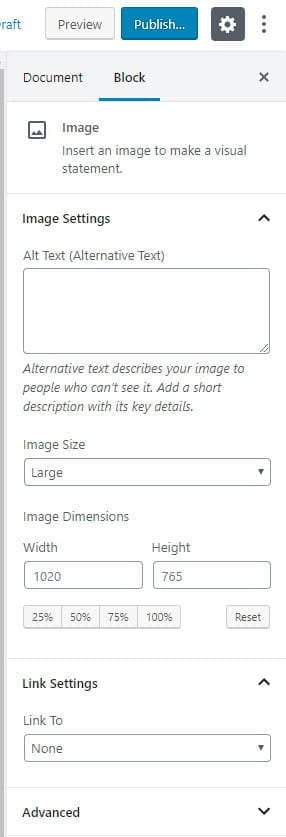
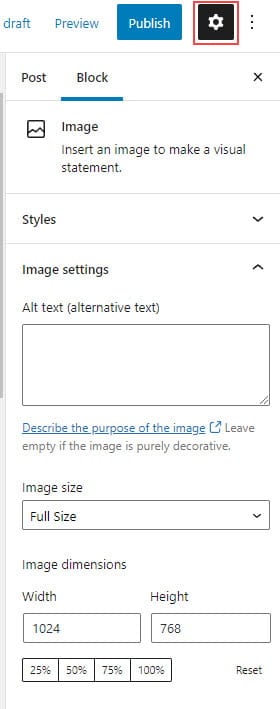
Each block has options in the editor sidebar that may provide extra customization in addition to the options found in the block toolbar. Click on the Settings icon next to the Publish/Update button if you don’t see the editor sidebar.
Below is an example of the Image block editor sidebar options.
Below is an example of the Image block editor sidebar options.
You can transform each block into another similar or related block type by clicking on the Change Block Type or Style icon on the left-hand side of the block toolbar.
For example, you can change from an Image Block to a Gallery block by clicking on the Change Block Type or Style icon and then clicking on the Gallery icon.

To remove a block you select the block and click on the three dots on the block toolbar then click on Remove Block.

Add Link to your About page
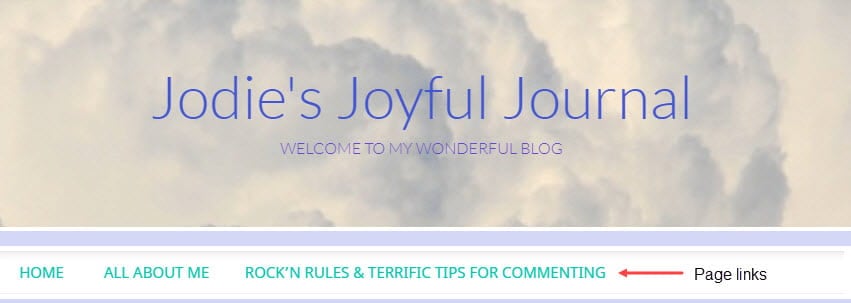
Some themes automatically add a link to pages in their top navigation while on other themes you need to add a pages widget or set up a custom menu to add the page links.
The image below shows page links in the top navigation of a student blog.
You’ll find step-by-step instructions for setting up custom menus here.
Your task
Complete the following tasks:
- Publish an About page. Creative ideas for your About page include: 1) Write a page about yourself; 2) Write an A-Z About page such as I am an athletic, yet brainy child who decided that saving the environment is one of my future goals; 3) Create a list of things that people may not know about you.
- Leave a comment on this post and tell us how you went writing your about page. Remember to leave a link to your about page in your comment so we can have a look at your new About page.
60 comments on “Step 3: Set up About Me page”
the thing that i wrote my blog is because i need the grade
It was very easy and actually pretty fun.
Just a little small paragraph about myself.
https://ditper5.edublogs.org/
it was easy 🙂
https://toler5711055770.edublogs.org/about-me/
I did a small list of a few things about me
It was ok. I enjoyed telling a bit about me.
Hello it’s Tori.
I really just wrote what I like to do and what it is like in the east coast. If you want to read my post for your self here it is.
https://stamm5714073774.edublogs.org/2023/04/27/about-me/
Tori Out.
https://town5710051270.edublogs.org/wp-admin/post.php?post=15&action=edit
When I wrote this it tool me a minute to decide what I was going to write but then I decided to do some random facts.
https://hiers5718094993.edublogs.org/a-z-page-about-me/ here is mine
it was easy
This is fun! My introduction is satire.
i just wrote 5 facts about me
https://baylenw3419.edublogs.org/about-me/
It was easy to figure out
This step was pretty simple.
I just wrote a few things about myself, the general things I tell a person when they want to know about me.
https://revelstera.edublogs.org/about-me/
The post/comments are very informational. It helped me understand how to do this.
https://stonekingemm.edublogs.org/2022/03/02/about-me/
I just put general things about myself that are important to me and make me the person I am.
https://coachmadak.edublogs.org/
https://asmatthews.edublogs.org/about-me/
I wrote things I would say when meeting a new person
I told everyone a little about myself
I just gave a little information about me and the things I like to do. This process was confusing to me but here is my link. ://masonrogozinski.edublogs.org/about/
This was a pretty easy process. Here is my link: https://lough18.edublogs.org/about-me/
https://jellyjess.edublogs.org/all-about-me/
This is my link to my All About Me page.
The boot camp is very helpful.
https://27nate.edublogs.org/
Hi this boot camp is really helpful!
I like it but I had difficulty and was hard.
i like this web site and i like tipping you should go check mine
http://jackier5376.edublogs.org/about-me/
I Learned that you can change your link this is my link http://hannahs7704.edublogs.org/sample-page/
http://mackenzeeq7786.edublogs.org/about/ i liked making my blog because it lets people know about me and my home town.
http://dx5246.edublogs.org/about-page/ It was fun.
http://kadences5378.edublogs.org/about/
I really liked to write the about me page.
I liked making the blog because there was a lot of new stuff i learned.
http://mackenzeeq7786.edublogs.org/about/ i liked making my blog because it lets people know about me
http://valeriem6505.edublogs.org/about/
To show people what I like and who I am.
It was not hard just a little tricky.http://dawsonrodgers.edublogs.org/sample-page/
I liked making my about me page because it tells the viewer more about me.
thank you
Ben
http://benaflekisanokactor.edublogs.org/hello-fellow-kids/
When I was writing my page, I was thinking up random but slightly interesting facts about myself and listing them off.
http://hughesnc14.edublogs.org/about-me/
I thought it was pretty cool that we got to do this and wasn’t hard at all!😁
Honestly, it took a long time for me to figure out what I wanted on my site’s About Page. At first, I knew that I wanted a lot of information somewhere, but I didn’t know where to put it all. Then, I organized pretty much everything out of the About Page itself because I thought it was irrelevant and deserved its own category. That left me with a blank About Page. In the end, I just wrote a brief paragraph about what the site’s purpose is. I also mentioned where users can find the contact info of the club officers.
Another thing: I have a full About category that features the general About Page, a page with the contact info of the club officers, a user directory, a questions page, and a meetings page that has all of the info about the month’s meetings. I went all out with that section.
http://rhswriteclub.edublogs.org/about-this-site/
This step took more time than I thought. I wanted to make a good introduction of myself to the readers.
I really enjoyed this step. I liked thinking about describing myself to someone who I’ve never met before and what the should know about me. This step was fun!
For my About page I just put facts that I thought was interesting. I tried to elaborate more so whoever reading it could have more details.
: http://sequansmith.edublogs.org/about/
For my about page, I just put some facts I thought might be interesting. It was easy to write because it was about me. aletapia.edublogs.org/sample-page/
Great start with your blog, Ale!
i explained what i would use to describe me and what i like to do.
i also included some of my social media stuff too
just wrote the basics
http://kellen123.edublogs.org/sample-page/
I followed the model and put my own information.
http://brebru2321.edublogs.org/about-page/
pretty easy to figure out and to do
The examples of the the other about pages were helpful and gave me ideas for my About Page.
http://malcolmrose.edublogs.org/about/
I wrote what came to my mind about myself and the things people would be more interested in reading.
http://skyste25.edublogs.org/sample-page/
I did 5 thing about me because that’s my favorite number.
http://jaylthom8231.edublogs.org/sample-page/
Nice work, Jyn. You’ve certainly included some interesting info here!
Hi Jyn,
I would love to leave a comment on your page or post but it is saying I need a password to login. You might need to change your privacy settings or if your blog is attached to a class blog, then your teacher might have to change those settings.
Hi I love to play video games and for fun I love to ride my four wheeler.And l play lacrosse.
Hi Tyler,
Lacrosse is an interesting sport! I gave it a try when I was a student but it’s not very popular here in Australia where I live.
hi I like lacrosse also but Ive never played on a team before. I really want to know how.
https://blackfurryandscared.edublogs.org/sample-page/
I just wrote what came to my mind that I wanted people to know about me!
Hi Riley,
Thanks for sharing your About Page. Remember when sharing your blog URL to not sure the part at the end that says /wp-admin etc. That’s just for you when you want to access your dashboard.
It sounds like you’re very busy with all your hobbies!