Week 1: Introductions
Welcome!
It’s time to start the challenge and time for some introductions!
This post is quite long because we have some reminders to go through. Tip: there is a menu on the right-hand side of this page this will help you navigate the post (you might not see it if you’re reading this on a phone or tablet).
Who Am I?
My name is Kathleen Morris. I’m a primary school teacher in Geelong, Australia.
I wonder what hemisphere you live in? I live in the Southern Hemisphere so it’s currently spring.
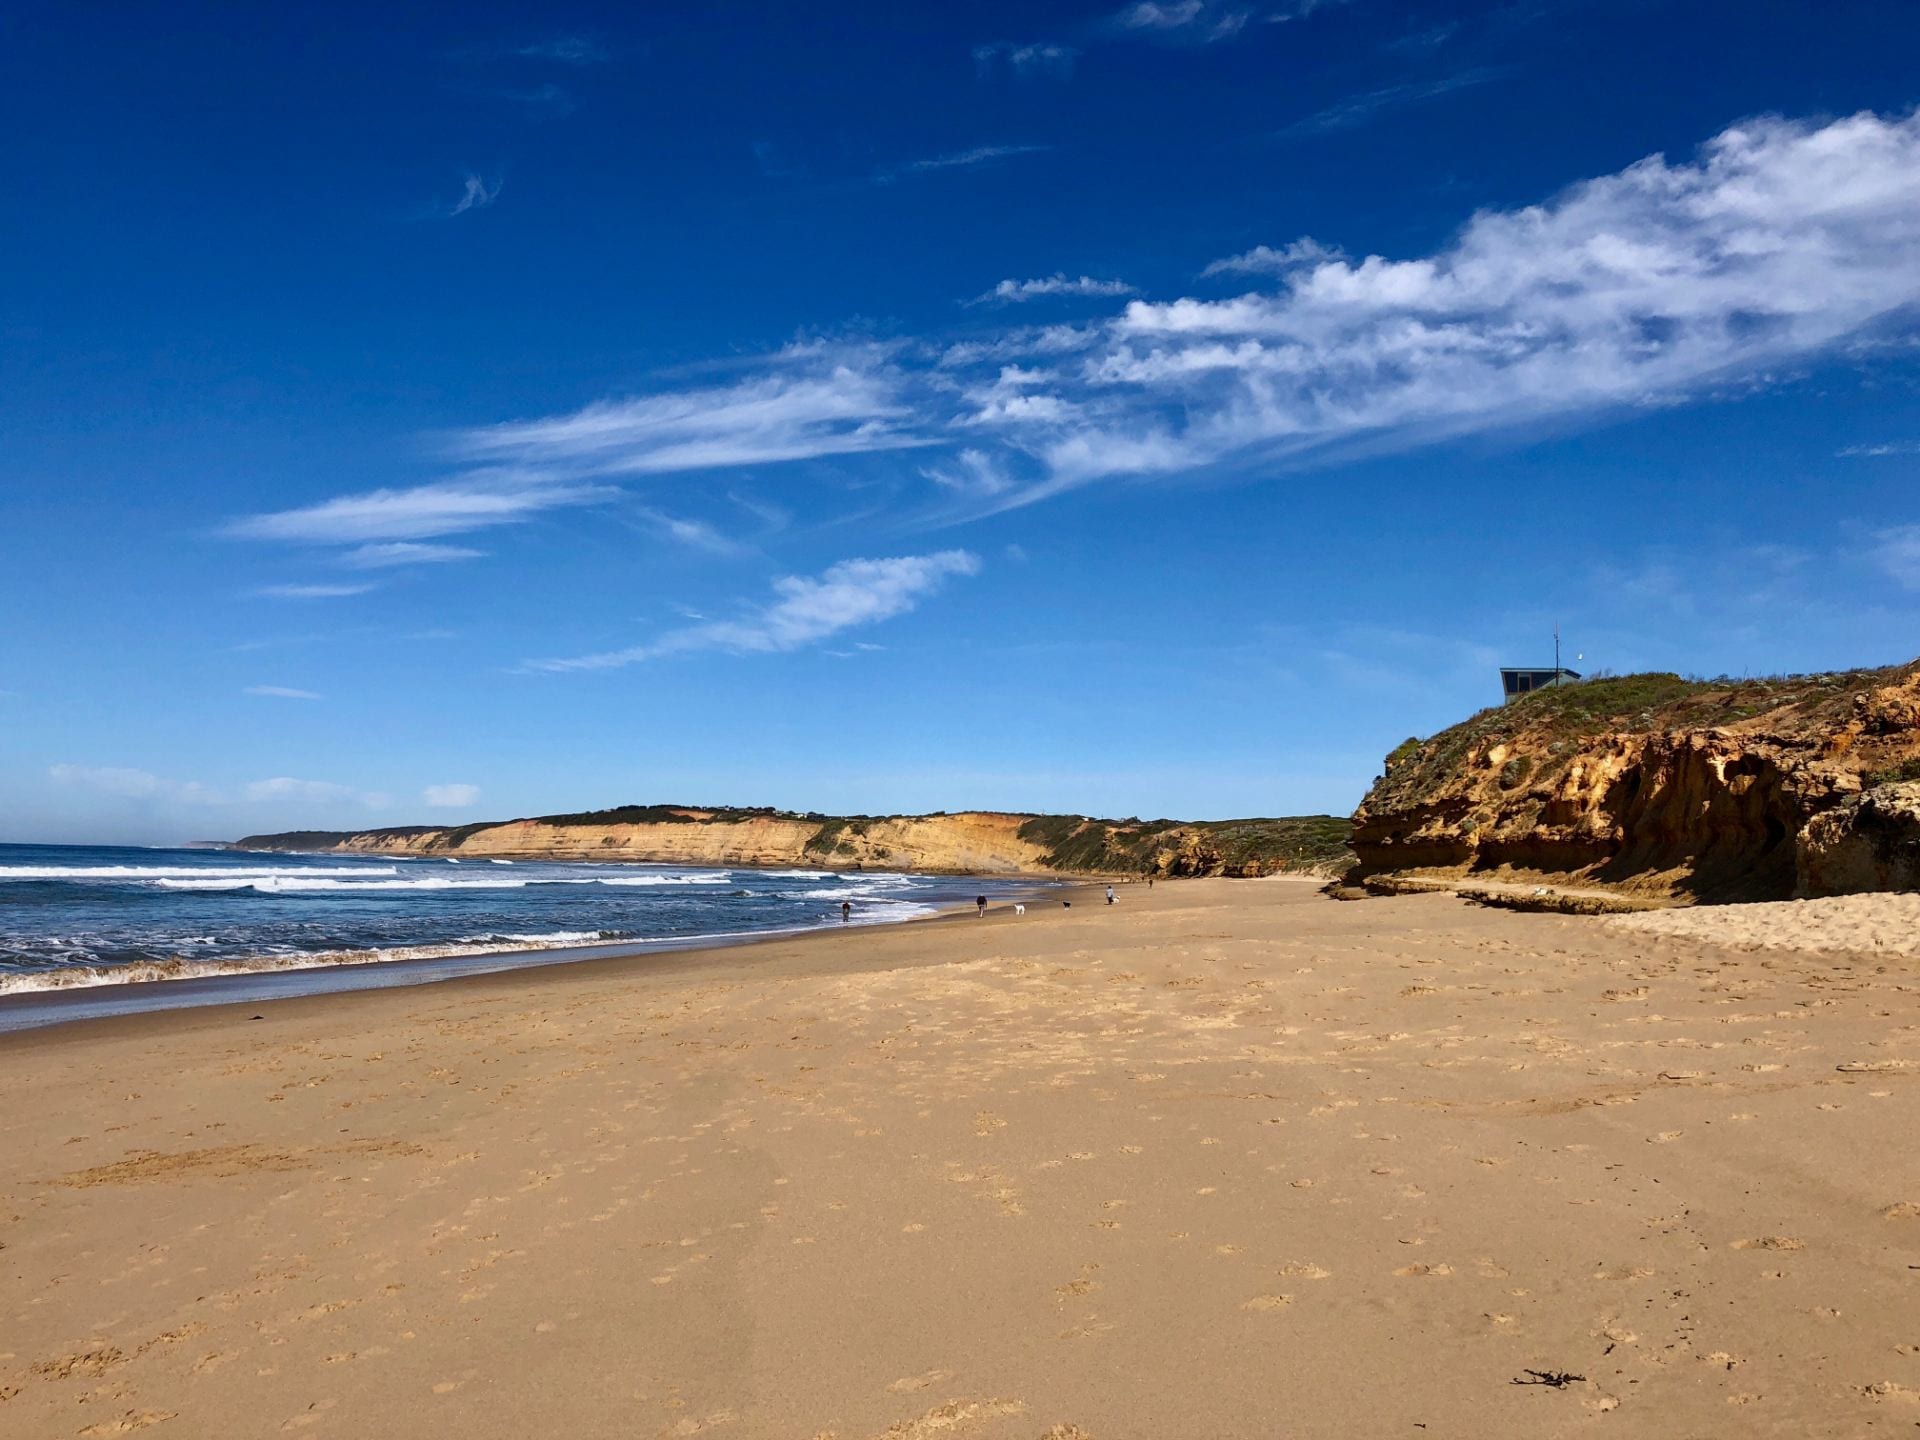
I work with Edublogs to help teachers learn about the wonderful world of blogging while also teaching part-time at a school near one of Australia’s landmarks — The Great Ocean Road.
Here’s a photo I took just a few days ago at a beach called Jan Juc.
I have a husband who’s a teacher, a 5 year old daughter, and a son who is 3.5.
I began blogging with my students in 2008. I have my own blog for teachers where I write about global collaboration, blogging, digital citizenship, online tools etc.
All of these things keep me very busy and I also enjoy doing a little running, hiking, reading, and cooking.
I’m looking forward to getting to know you too.
About Our Participants
So far we have about 1550+ individual students and 135 classes registered.
Our participants represent 27 countries and 6 continents.
Are any of the continents of the world not represented? I wonder why?

Getting To Know Each Other
This week, we have three tasks designed to share a little about ourselves with the other participants.
The tasks involve:
- Making an avatar
- Creating or updating our About page
- Searching for other students
You’ll find more details about these tasks below.
Firstly, we have some challenge information and reminders to go through.
Administration
The Weekly Process
Each week, we’ll follow the same process. There will be some information on a blog post to read through so you can learn more about our topic and then some tasks to choose from.
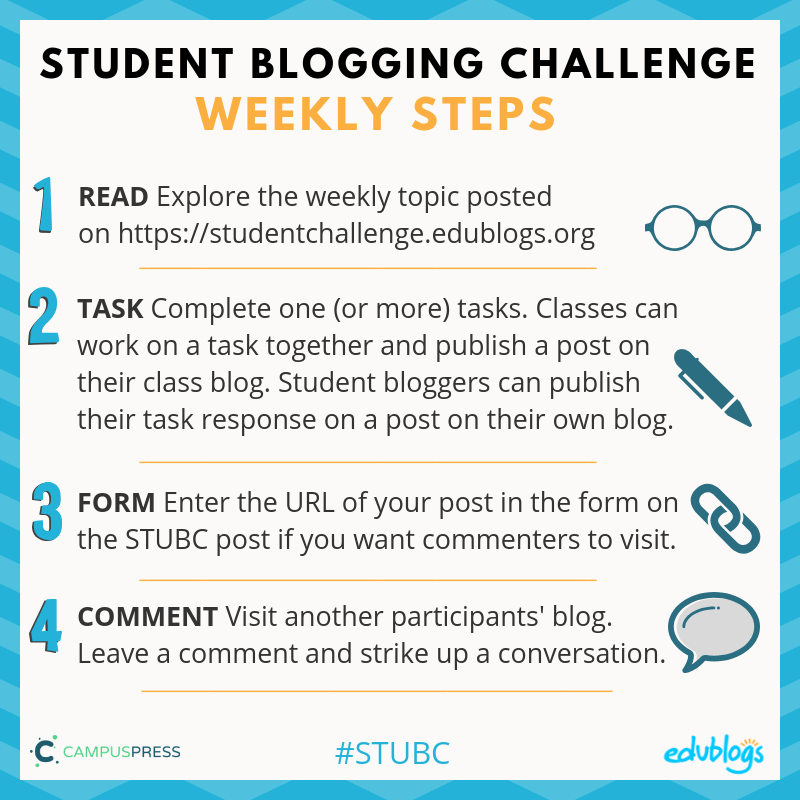
Four step weekly process:
- Read the weekly post. This will be published every Sunday (Australian time). If you have signed up to our mailing list, you’ll get an email telling you about the weekly post.
- Task. After you’ve read through the post, choose one or more tasks you’d like to work on. If you have a class blog, teachers and students can work on the post together and publish it on your class blog (or perhaps the teacher can post, and the students can comment). For students with their own blog, you’ll publish your task response as a post on your blog.
- Form. Once your post is published, head back to the weekly post on this Student Blogging Challenge site. At the bottom of the post, you’ll see a Google Form. Enter your blog post URL and details into the form if you’d like a commenter to visit you.
- Comment. Making connections is a big part of the challenge and the more you put in, the more you’ll get out! Take the time to visit another participants’ blog and leave them a comment. You’ll find the links to everyone’s weekly posts on the sidebar of this blog. Here is the link to the week one spreadsheet.
Here is a summary of the weekly process. Feel free to copy this graphic and display it on your blog etc.
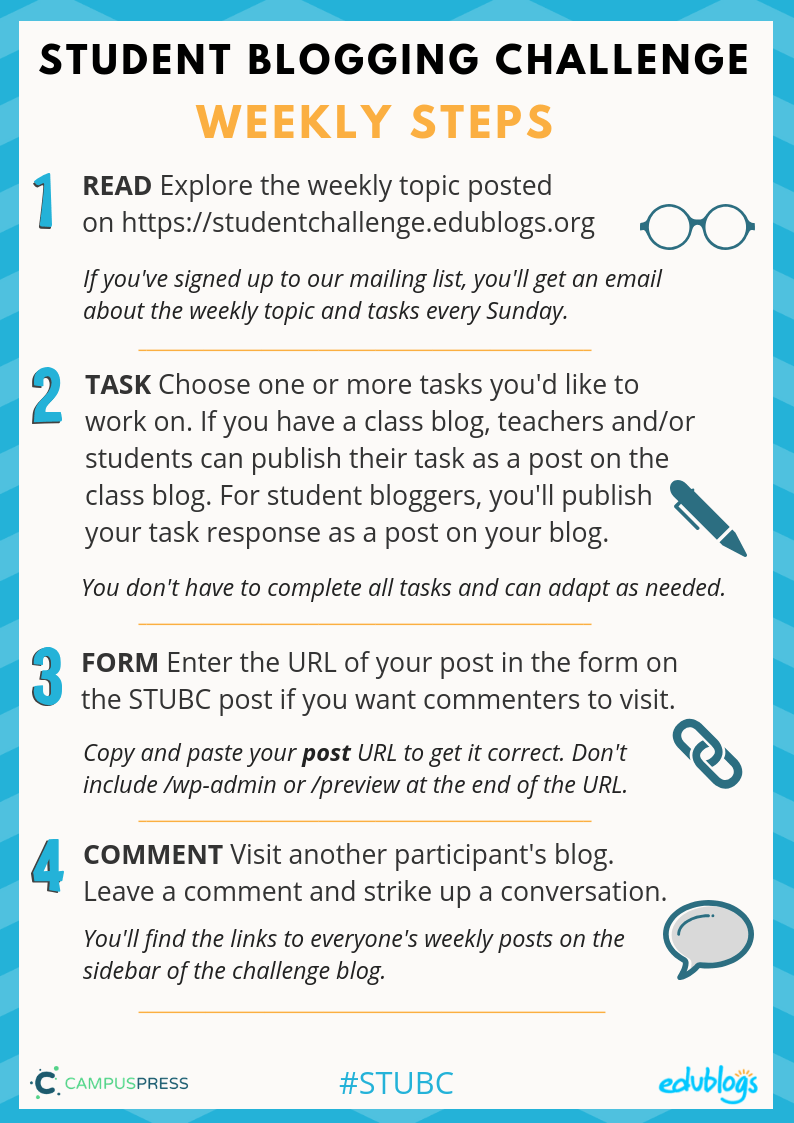
This A4 poster version might be handy to print out for students or use as a classroom display.
Teachers — You’re welcome to copy and paste the weekly posts onto your own class blog and adapt the activities as needed (change them/add/omit). Just remember to link back to the challenge post somewhere on your post.
Students — Remember, most weeks there will be a number of activities to choose from. You don’t have to complete them all. When you complete an activity, remember to fill in the Google Form at the bottom of the post. A commenter will visit to leave you a comment. Remember to read and reply to their comments politely and in a timely fashion.
General Reminders
- Check our registration pages to make sure your details are listed correctly. If your name is highlighted in pink, there is an issue that needs attention. Click here to go to the student registration page. Click here to go to the class registration page.
- Edublogs/CampusPress users with student blogs — If all the students in your class have blogs and your teacher uses ‘My Class’, you should have a widget called ‘Class blogs’. Make sure this is on your sidebar. This video shows you how.
- Add the challenge badge to your sidebar. There is a post showing you exactly how to do this. Click here to go to the badge post.
- Can visitors leave comments on your blog posts? Double check this. If you’re using Blogger, make sure anyone can comment using the Name/URL option (so they don’t need a Google Account). Blogger commenting instructions are here.
- Please moderate comments regularly — at least once a week if not once a day. It’s in the comment section where the most powerful learning and connections can take place!
EDIT: Did you see the reminder post that was publish mid week-one? Click here to read the important reminders.
Now onto the tasks!
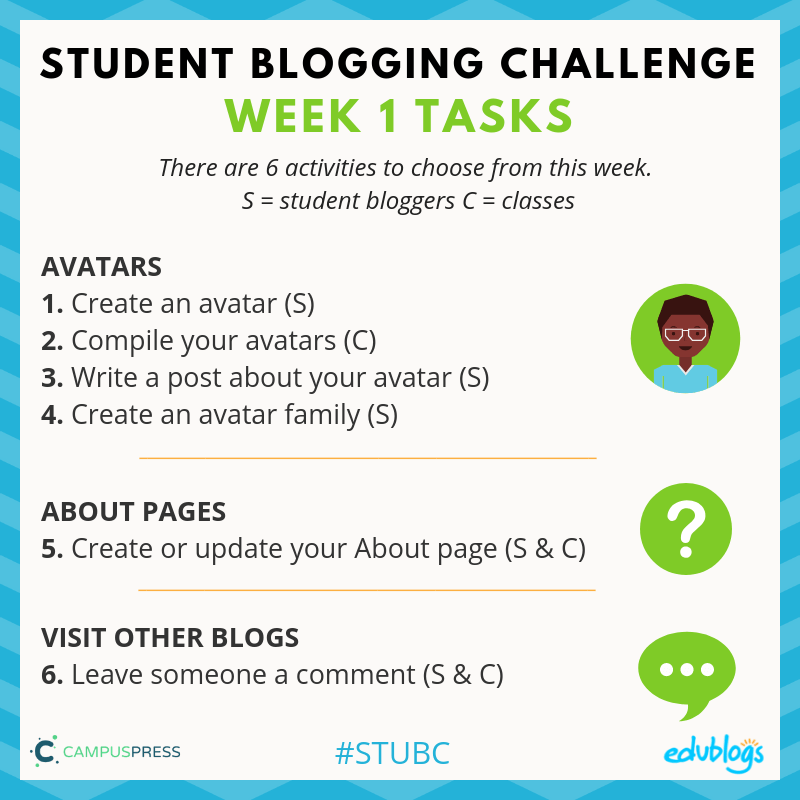
Week One Tasks
While you don’t have to complete every task each week, this week you might try to have a go at doing one of the activity suggestions for all three tasks if you have time. This will get you off to a great start!
Here is a summary. I will explain each activity in more detail below with some examples.
Stay Safe Online
Remember, as we’re sharing information about ourselves, we need to be internet savvy and avoid sharing too much information or personal details.
I like to tell my students to never share their YAPPY online. There is some other information that’s more of a ‘grey area’. These are things you should discuss with your teachers and parents.

Task 1: Avatars
Do you know what an avatar is? It’s simply an image that you use to represent yourself on the internet. It’s like a character that represents your online identity.
A lot of adults have a real photo as their avatar, like this:

It can be a better idea for children to use a cartoon representation of themselves (check with your teachers/parents if you’re not sure).
![]()
Here are four avatar activities to choose from.
Activity 1: Create an avatar
Students can create an avatar to use on their blog.
There are many different avatar creation sites on the web:
- Some tools allow you to save the avatar to your computer to then upload into your blog.
- Others tools require you to take a screenshot of your avatar and save it as an image. Tip: This article shows how to take a screenshot on any device.
- The Symbaloo below was compiled by Miss W to share links to sites where you can make an avatar. If you want to embed the Symbaloo on your own blog, click on the share icon at the bottom and copy the embed code.
- Miss W recommends the sites on the right-hand side as some of the easiest tools to use.
- Know any other avatar creation tools that aren’t on the Symbaloo? Leave a comment on this post.
Once you’ve made your avatar, you need to add it to your blog so it shows up when you comment.
- If you’re using Edublogs or CampusPress, check here for instructions.
- If you’re using Blogger, check here for instructions.
- If you’re using Kidblog, these are the instructions you’ll need.
Activity 2: Compile all your avatars
Got a class blog? Students can make an avatar using one of the tools mentioned above. You can then share all the avatars on your class blog.
There are a few ways you could do this:
1) Slideshow
You might share your students’ avatars by writing a post that includes a slideshow of your avatars.
There are a number of ways you can make a slideshow:
- You can create a video animation using Animoto and embed it in your blog. Check out this example from Room 15. Tip: Animoto offers free accounts for educators.
- You can make a slideshow using the Jetpack module, following these instructions. This applies to Edublogs and CampusPress users.
- You can add the images to a Google Slide presentation and embed it in your blog. Check out this example from Mrs. Vazquez’s class. She has made us a tutorial to show how to create a Google Slide presentation too.
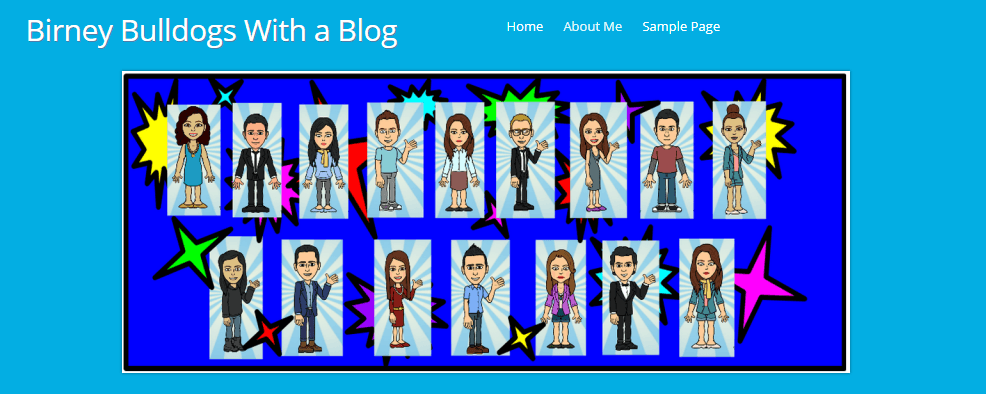
2) Custom header image
You can make a custom header image that includes all the avatars. See this example from the Birney Bulldogs (they’ve also added their avatars to their About Page).
How to make a header image for Edublogs or CampusPress users:
- You will need to use a program like PowerPoint, Google Drawings, Google Slides, or Canva.
- The first step is to check what size your header is by going to Appearance > Customize in your blog dashboard. If you don’t see the Header Image section in the Customizer it means your theme doesn’t support the use of a custom header image.
- When you click on Header Image in the Customizer, it will show you the dimensions of your header image. Make a note of this. For example, it might say 1000 x 150 pixels.
- In your program, you need to change the size of your blank canvas to the size of your header.
- You’ll then upload the avatar images and arrange them how you like them.
- Save your creation as a PNG or JPEG and then follow these instructions to upload the header image to your blog.
- Need more help? Check out these instructions by Stef Galvin.
3) Sidebar slideshow
You can add a slideshow to your sidebar using the gallery widget. Follow these instructions to find out how.
Activity 3: Write a post about your avatar
Tell us how your avatar represents you. Include a link to the website where you created the avatar. Remember to include your avatar as an image in your post.
Tip: If you’re writing a post about your avatar, choose an interesting title not just ‘avatar’ as this could cause an error on your blog.
Examples:
- Here is an example of a great post from Naho in Hawaii.
- Braeden made a Lego avatar and wrote about it here.
Activity 4: Create an avatar family
Create a custom avatar for each of your family members. Include the avatars in a post and tell us a bit about each family member (remembering not to give away too many personal details).
Examples:
- Josh used a range of tools to make avatars for the members of his family.
- Amelie-Rose made avatars for her family members.
Task 2: About Page
Activity 5: Write or update your About page
Posts Vs Pages
Do you know what the difference between a post and a page is?
- Posts are where you publish your regular updates.
- A page is for more static information that you don’t expect to update too often.
- You might publish lots of posts but only have one or two pages.
Find out more about the difference between a page and a post in this article on The Edublogger.
Remember, we don’t say, “I wrote a blog”. We say, “I wrote a post” or, “I wrote a page”.
Page instructions
If you’re using Edublogs or CampusPress, click here to find out how to add an About page, or watch the video below.
- If you’re using Blogger, these instructions will help you add pages.
- If you’re using Kidblog, you might need to add a post instead of a page.
About pages
The most important page on your blog is your About page.
Whenever I visit a blog for the first time, I always look for an About page. It’s a way to find out who’s writing the blog posts, what their background is, where they’re from etc.
Some bloggers forget to edit the default ‘sample page’ that appears when you set up a new blog. Or they forget to update an About page that they might have written years ago.
This task involves writing an About page for your student or class blog. If you already have an About page, check to see what else you can add or edit. Be creative!
There are many ways to write an About page.
You might want to include:
- You first name
- Your approximate location (even just state or country)
- Your age or grade level
- Some of your interests
- What your blog is all about. Tell us what you’ll be writing about
Remember to be safe online: don’t include personal details like your YAPPY (see above).
You can get creative when writing your About page.
Here are some ideas and examples that classes or students could use:
- Write a poem. It could be a traditional rhyming poem or any other style of poetry. Learn about different styles of poetry here. Here is an example from Daniela.
- Write an A-Z about yourself (e.g. I am an athletic and brave child who decided that saving the environment is one of my future goals). Check out how commenter Dinah created her A-Z About page especially for the Student Blogging Challenge a few years back.
- Write a ‘Who am I?’ or list of things people might not know about you like Ms. Herring, Mrs Keane, and Mrs Lyttle.
- Students in Ireland paired up to create a line for their class About page and Ms Seitz’ class did the same.
- Mrs Moore’s class wrote about their school.
- Huzzah! class included a map to show where they live.
- Student Rajyashori wrote a creative interview script.
- Brianna (ex student commenter) has a great “favourites” About Me page, as well as an A-Z post.
- Year 5/6 Class at Westwood with Iford School made a Thinglink.
Task 3: Visit other blogs
Activity 6: Leave a comment
One important aspect of blogging is commenting on other blogs.
Remember: The more you put in to making connections during this challenge, the more you’ll get out!
There are two places you can find other participants’ blogs to visit:
- The pages at the top of the blog. There is a page for student bloggers and a page for class bloggers. These are sorted by age. Student bloggers have hobbies listed so you hopefully can find someone who is not only a similar age to you but shares some of your interests.
- The link on the right-hand sidebar of the blog. This will show you the spreadsheet of students/classes who have submitted their posts in the weekly Google Form. Here is the link to the week on task responses.
Commenting advice
We’re going to talk more about quality commenting next week but for now, you might want to remember:
- Write your comment like a letter
- Ask a question, make a connection, or give a compliment
- Leave your blog URL so the blogger can also take a look at your blog
Don’t forget to approve your comments and reply to any comments as soon as you can!
If you’re working as a class, you might start by writing some comments together as a whole class activity. Students could then write comments individually or in small groups.
This video by Mrs Yollis’ third grade class demonstrates how they approach commenting as a whole class activity.
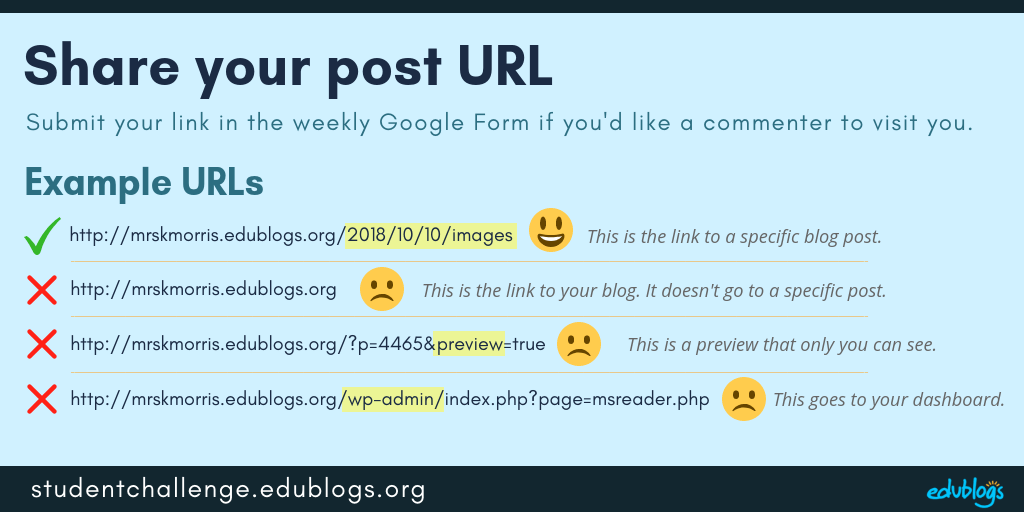
Submit Your Post URL ⬇
If you want a commenter and other participants to visit your blog, remember to fill in the form below for each activity you complete this week.
You need to submit the URL of your post (or your About page).
- Do not submit the URL of your blog or your dashboard.
- Click on the title of your post/page and then copy the URL from your address bar.
- If you complete a second or third activity, you can fill out the form more than once.
This graphic below should help you understand what a post URL looks like if you’re using Edublogs/CampusPress/WordPress
 The Google Form

Edit: This form as now been closed as our commenting team are busy working on tasks from later weeks.
Next week’s topic: Quality commenting
What's on this page?
13 comments on “Week 1: Introductions”
Is the form supposed to be closed? I went to put my post for this week in the form, but it said it was closed.
Hi there, you’ve stumbled across an old post/form from 2018. Here is the current post with the new form. Hope that helps!
https://studentchallenge.edublogs.org/2020/03/15/wk1-march/
Do you have to be part of this class to do the challenge
Anyone can take part! 🙂
Hi Ms. W.!
I was wondering if you could take me off the list for the Student Blog Challenge because I don’t think I’ll have the time to complete it. My name is Maggie and my blog URL is blog.elanco.og/davison503/. Thanks!!
I’m sorry, I meant Ms. M..
Done! No problem, Maggie. Maybe you’ll like to join us again for one of the future challenges! 🙂
What does it mean if your name is highlighted in orange on the class list spreadsheet?
Hi there,
Your class blog is password protected which means it can’t be seen by all our commenters and participants. If you go into your dashboard and go to settings > reading, please select “Discourage search engines from indexing site but allows normal visitors to view ”
Thanks!
Good job
My class blog url is incorrect – this is the correct url http://eisnertechclass.edublogs.org/ thanks!
Thanks, Joel. All fixed!
thanks