This series is designed to guide you step by step through the process of learning to blog. The activities can be completed at your own pace and in any order.
The series assumes that your student blog has already been created ready to use. Refer to sign up & register blog if you don’t have a blog.
The aim of this first activity is to:
- Learn what a blog is.
- Help you log into your blog, navigate the dashboard, change your timezone settings, and change your theme.
What is a blog?
Watch the following video to learn more about blogging.
Key blogging terms to listen for while watching the video are footer, header, menus, pages, posts, comments, sidebars, theme, and widgets.
Practice what you’ve learned by completing the following crossword puzzle!
 Loading...
Log into your blog
Your blog dashboard is the administration area of your blog where you write posts, pages, manage comments, change your blog design, add widget etc.
The easiest option to log in to your blog dashboard is to use admin bar at the top of your blog.
An admin bar is located at the top of all newly created Edublogs.
Here is how you log in:
1. Go to your blog URL.
![]()
2. Click on the Log in link in your admin bar.
3. This takes you to your login page.
4. Enter your username and password then click Log In.
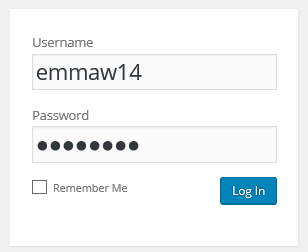
Your login details are included in the email sent when your blog was set up or are provided by your teacher.

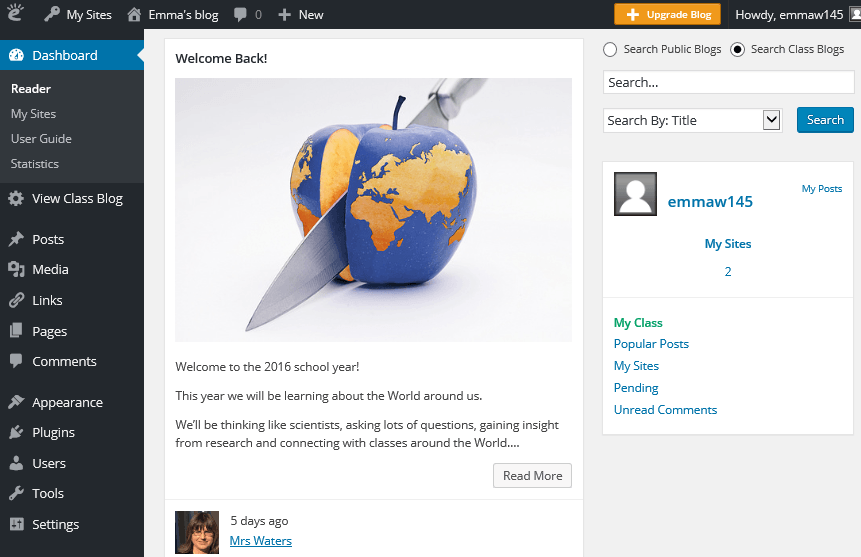
This should take you to the dashboard of your student blog. Your dashboard is made of your main navigation on the left-hand side and Reader on the right with the admin bar at the top.
The Admin bar
The admin bar at the top of your blog provides shortcuts to blog features.
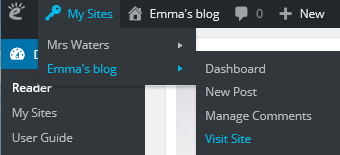
Drop down menus appear when you hover your mouse over the icons in the admin bar.
The My Sites menu, located next to the Edublogs logo, is on the left-hand side of your admin bar. The My Sites menu provides handy shortcuts to areas inside your dashboard such as the dashboard, new posts, comments and a link to your class blog (if connected to a class blog).
Reader
By default, the Reader is displayed on the right-hand side of your dashboard when you log into your account.
The reader is designed to make it easy to read and comments on posts from directly inside your dashboard. This is where you read posts from everyone in your class if all student blogs are connected using My Class.
Your navigation menu is on the left side of your Dashboard.
Hovering your mouse over a menu item displays all the sub-menu options under that item.
You can return to the dashboard area of your blog from any page within your administration panel by clicking on the Dashboard menu item at the top of your navigation menu.
Check your settings
The default timezone settings on all newly created blogs is based on London, UK time. All posts and comments are automatically time stamped as London time unless you change your timezone.
To learn how the main navigation menu works we’re going to get you to change your time zone in Settings > General to your location.
Here’s how to change your timezone:
1. Go to Settings > General
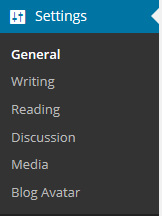
2. Select your timezone from the drop down menu option.

3. Click Save Changes.
Customize your blog theme
Your theme is what controls the look and appearance of your blog; this is what people see when they visit your blog.
This is how you give your blog its personal touch.
Like most things in life, first impressions count.
Great blog themes make good impressions on readers so that visitors are more likely to check out your blog. Overwhelming themes detract from your blog content, and make visitors less likely to read your content.
Every newly created blog normally has the same default theme. The last thing you want is to look like all the other blogs.
Customizing your blog theme is normally one of the first thing most people want to do when they first log into their blog.
Your final task is to change your blog theme and customize it.
Have a look at the following student blogs to get ideas on how other students have customized their blogs:
- simplyaubree.edublogs.org
- ethancaba14.edublogs.org
- 6jacquelineg.edublogs.org
- blog.elanco.org/forre5yz
Using the theme customizer
Customizer video
Here’s how to change your theme using the theme customizer:
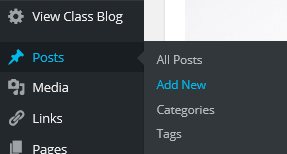
1. Go to Appearance > Themes
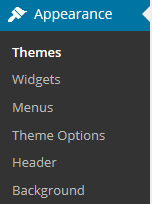
2. Click on ‘Live Preview‘ below the theme you want to use.
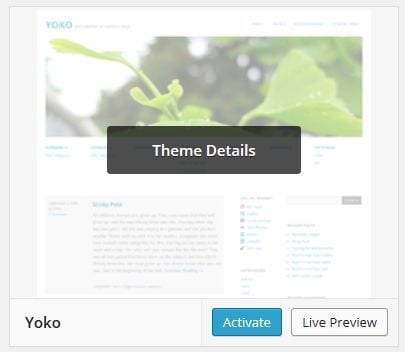
Or if you want to customize your current theme, click on ‘Customize‘ under the current theme.
3. This loads the customizer. Now all you do is work through the control panels on the left to customize the theme to preview the theme changes in real time before activating it on your blog.
4. Once you’re happy with the changes you just click ‘Save & Publish’.
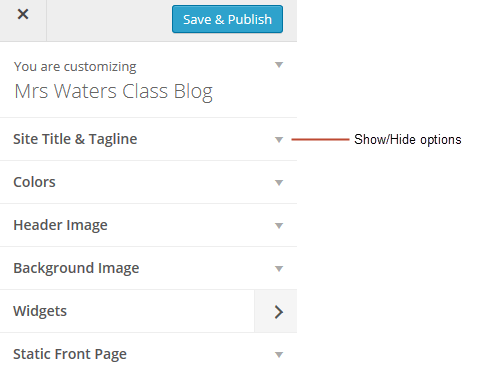
Below’s a quick summary of each customizer control panel:

Don’t change your site title without asking your teacher!
Uploading own custom header image
Almost all our themes include an option to upload your own custom image header.
A custom image header is a great way of adding your “own personal touch” to your blog.
Uploading your own custom header image is as simple as:
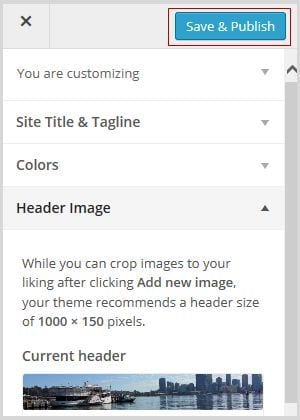
1. Click on Add new image in the header image section of the customizer.
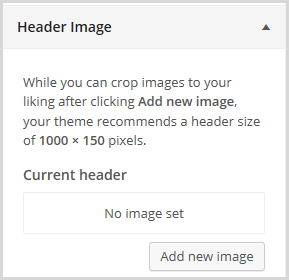
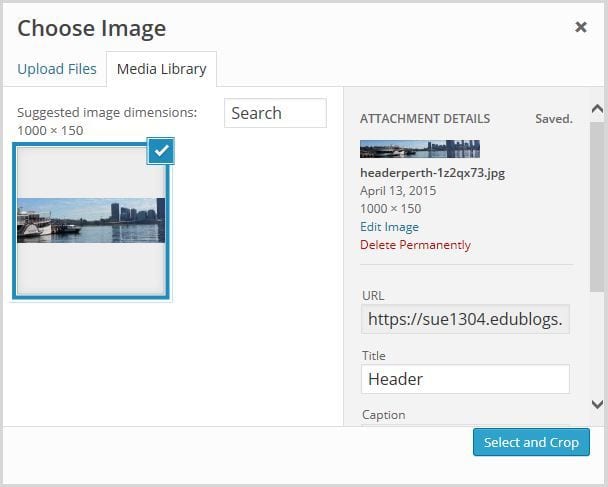
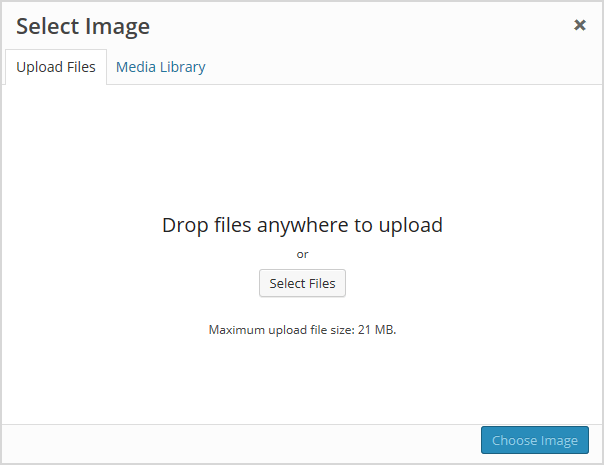
2. Choose an image from your media library or upload a new image from your computer.
- Only .jpeg, .gif, and .png files can be used for image headers.
- You’ll find a wide range of images on Pixabay that you are allowed to use for free.

3. Click on Select and Crop.
4. Click on Crop image.
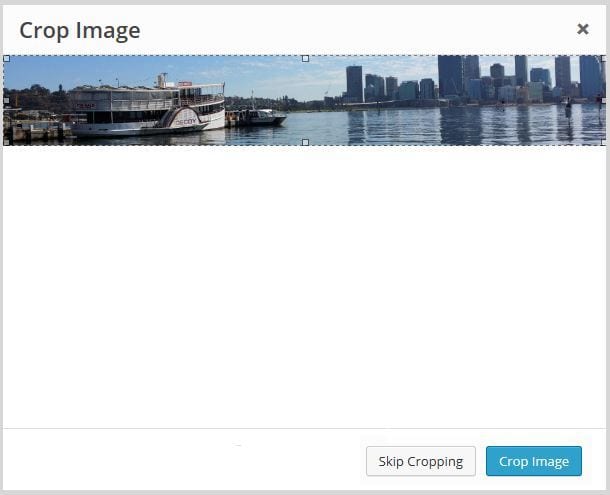
5. Your new header image should appear in your blog preview window.
6. Click Save & Publish on the Customizer to activate the new header on your blog.
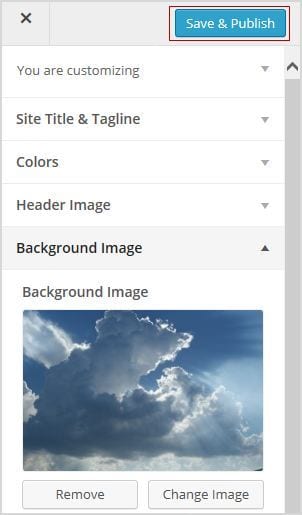
Uploading own Background Image
On many themes, much like custom header images, you can add images to your blog’s background. A background image is another great way of adding that personal touch to your blog.
Click on Background Image in the Customizer.
- If you don’t see the Background Header section in the Customizer it means the theme doesn’t support this option.

3. Click on Add new image.
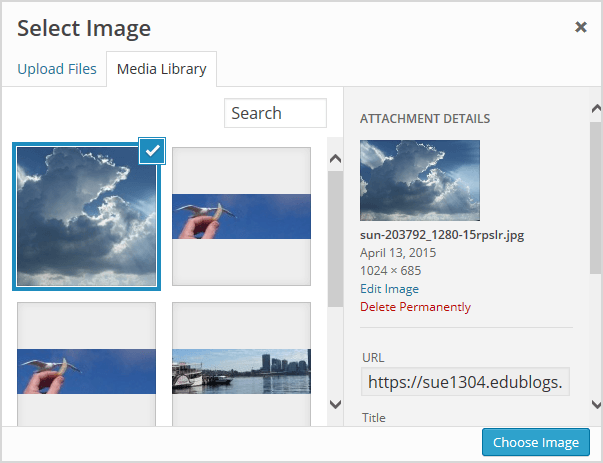
4. Choose an image from your media library or upload a new image from your computer.
- Only .jpeg, .gif, and .png files can be used.
- You’ll find a wide range of images on Pixabay that you are allowed to use for free.
5. Click on Choose Image.
Once you have selected an image the background image options will appear:
- Background repeat: controls if the background image is repeated. Choices are:
- No Repeat -background image is only displayed once on the page.
- Tile – background image is tiled horizontally and vertically.
- Tile horizontally – the background image only repeats horizontally.
- Tiled vertically – the background image only repeats vertically.
- Background position: allows you to control the position of the background image. Options are left, center and right.
- Background attachment: determines if you want the image to scroll with the content or to remain ‘fixed’ in place when a reader scrolls down the page.
For best results, we recommend you use Tile, left and Scroll.
6. Your new background image should appear in your blog preview window.
7. Click Save & Publish on the Customizer to activate the new background on your blog.
Your Task
Complete the following tasks:
- Change the time zone of your blog to your location in Settings > General.
- Change your theme in Appearance > Themes and customize your theme. I recommend you select a theme that has a sidebar as you will be adding widgets to the sidebar in Step 6.
- Optional: Practice what you’ve learned about blogging terms and vocabulary by completing the blogging crossword puzzle. Use this sheet to check your answers.
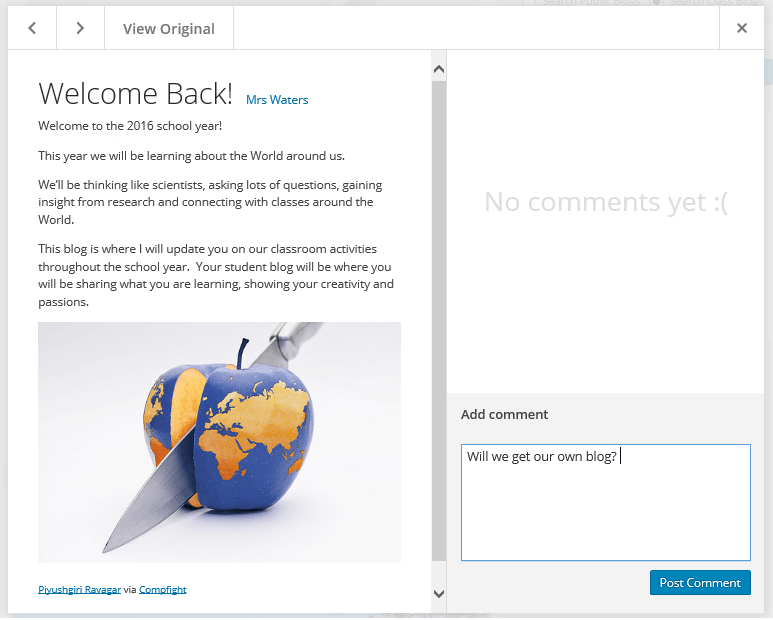
- Leave a comment on this page to tell us how you went logging into your blog and changing your theme. For example, you could tell us what theme you chose and why? Or what you found easy? What aspects were hard and you would like to know more about? Remember to leave a link to your blog in your comment so we can have a look at your new blog.
im lost
it was simple 🙂
Easy
pretty straight forward and simple enough just might take a minute to understand.
im cunfused
confused*
Simple enough!
Idk how to do this
real
very easy took no time
simple.
Easy to set up
It was easy to set up
easy to set up
Creating my blog was pretty easy. Link to blog is as follows https://dasarayransberry.edublogs.org/wp-admin/edit-comments.php
pink kermit theme for the win!!!!!!!!!
Pretty easy.
just setting up. Learning now how to use the blog site.
confusing but easy
still a bit confusing
eh it was okay, it wasnt hard to navigate
not so hard and I understand what I’m doing for each thing and easy to follow along too.
its ok
thank you
k
it was alright
ok
I didn’t enjoy any of this because I find it extremely boring. Here’s my site https://adriannasevret.edublogs.org/
ok
Hello,
I had a great time changing the appearance and setting up my blog. For my blog I used the Accelerate theme. I like a plain a simple one so that it is not over powering.
ok
ok
I changed my theme to activello becasue I liked the way it looked and was easy to add widgets.
ok
Setting up my theme was pretty easy and there were a lot of options to choose from.
ok
This was relativity easy to create. Def reccomend it to ppl with little to no knowledge bout dis type of crap. 10/10
i chose the theme adelle. it was pretty easy setting up this blog, you just had to follow the directions
I chose the star theme cause it was cool and it was pretty simple but cropping I don’t really get but I made use and I made it work.
ok
I thought there was a bit of a learning curve with photos and cropping and what you could and could not do with them. We do a lot of hiking at Old Man’s Cave in Hocking Hills. This photo was taken on one of our hikes. It is just a calming picture that is connected to good memories.
https://coachmadak.edublogs.org/
setting up went good
I chose to use the Able theme. I am an elementary educator, and I liked how easy to read an neutral the font was. I found the process to be easy to follow so far, and I like the customization features available.
There is no navigation pane on the left side of the screen as shown in the screenshots above. Is that only a Pro feature?
Hi there,
The navigation isn’t a Pro feature. If you’re using a computer you’ll see it on the left. It might look a little different if you’re on a tablet.
Check out these images https://help.edublogs.org/user-guide/mobile/#Option_1_Browser
If you need more help navigating your blog, feel free to email support@edublogs.org
Good luck! 🙂
I chose Amalie Lite for my theme because I liked the overall look of it, and I found every step pretty easily.
http://27nate.edublogs.org/
My blog’s theme is Twenty Seventeen, but I customized it so now the image for the header is my pet! Feel free to visit my site http://riddhi4k.edublogs.org/
I chose Klean as a background
Hi Ronald, thank you for subscribing, enjoy your journey of discovering the world of blogging!
Cool
i think overall once you get used to the work it becomes pretty simple for my theme i chose a sort of starry night theme
I chose the Afterlight theme. This was pretty easy.
I’ve actually had my blog since August of last year, but I decided to do the Blogging Challenge to catch up on some Edublogs tricks (not gonna lie, the free Pro account interested me, too). When I created a blog for my school’s Write Club, I wanted to have a theme that related to writing. So, I chose the Grisaille theme because it reminded me of a newspaper. I also chose this one in particular because the documentation states that it’s mobile-friendly. In a digital world, that is practically a necessity. In fact, I wouldn’t have chosen Grisaille if a different theme that I had liked better was mobile-friendly.
After choosing the theme, I added a background that looked like newsprint to emphasize the idea of a newspaper, then changed the colors a bit so the text would be navy instead of black and the links would be orange upon hovering. Finally, I added our motto, “All write, all write, all write” in the tagline.
I’ll add the URL to the blog here for the sake of the challenge, but it’s password-protected. Sorry, guys!
https://rhswriteclub.edublogs.org/
I can tell you’re a very expressive writer and am not surprised you’re part of a Write Club. Sounds like an excellent plan with your theme choice too!
You’re right about mobile friendly themes being so essential these days too.
Good luck with your final steps!
Kathleen Morris
Edublogs Community Manager
@kathleen_morris
I chose the Aperture theme because it looked like it would help me organize my blog in the right categories and ways, and the background looked really cool.
Also my blog is http://josiahb.edublogs.org/
I think this was a good introduce to blogging and I can not wait to go to my blog and put a theme in it
Setting the theme was simple, easily customizable with my own photo.
i agree
This is the first blog I have created. I have created retail websites using different software. I really enjoy this program and have already learned a lot. I love that you can customize every aspect of your blog. I found that choosing the theme was the most difficult.
I changed my timezone and my appearance as ectoplasm I love blogging I just had to do something different
This went well. I found the instructions easy to follow and everything was user-friendly. I am much less worried about getting my students to create their own blogs.
I like this introduction to a blog, its fun.
i chose anarcho notepad as my theme because i thought it looked nice.
I chose amadeus because it’s modern and simple, so it fits my taste.
this is a great way for people to make a good blog easily
cap
this is a little wired but i’m getting use to it
I loved creating and editing my blog page, it was very easy to understand the controls. The theme I chose was very simple and organized for those who will view my blog.
https://skyste25.edublogs.org
I chose bootswatch because the sunset was pretty.
Changing the theme was pretty easy and simple.
http://malcolmrose.edublogs.org/about/
Creating my blog was pretty easy.I liked picking the theme because there was so many to choose from and they all looked different
This was a very easy process for me because it gave me the directions to follow it was a little complicated at first but i adjusted to it.
I found it pretty easy, when i started the following the the steps i understood everything more. It helped me out a lot with finding where everything was at &b how to use it.
i chose what what i chose because it looked cool.
I chose 14-Glassy because it looked very nice and had a sidebar as the steps said it would be needed in step 6
Nice choice! A sidebar can be really helpful so good idea choosing a theme that allows that. 🙂
Making my blog my own we so much fun I choose EduBoard because it looked really cool. I also added the snow effect to it. I love Hamilton so I added some quotes and photos to the site. I added a calendar so I my viewers would know the day it is. It was easy to set it up and I’ll be happy to help anyone else with it.
My blog is :http://jaylthom8231.edublogs.org/
Jyn, that’s so kind of you to offer your help to others!
Creating and Logging into my blog for the first time was pretty straight forward. Picking the theme was pretty tricky because there’s so many to chose from. I ended up choosing Eemeli because it’s so simple and easy to navigate. http://1corae.edublogs.org/
I went into my blog by longing in and going to my blog. After that I hit the customize button an decided i wanted to change the theme of the blog because I thought the default theme was bland. I decided that the Afterlight theme was the best theme for my blog because i like the way all the widgets are hidden until you press the button on the right hand corner. I thought that changing the theme and adding the widgets was easy. One thing i found hard was hard was trying to add new widgets. For example I saw this cool widget on another persons blog but i couldn’t find it on my widgets, it was a widget of a globe that showed where all the viewers came from. But besides that everything else turned out very easy to understand.
Hi 1noer,
Here is a post containing lots of widgets and instructions on how to add them to your sidebar. http://edublogs.org/2010/10/21/the-top-widgets-to-embed-in-your-blog/
I’ve found it pretty easy to set up my page and connect my students using the “My Class” feature… I would like to know where you can access more widgets, such as the flags/globe showing visitors of the blog from all over the world… sunellesimpfenderfer.edublogs.org
G’day,
Here is a post updated in June this year by Sue Waters showing popular widgets for class blogs as well as student blogs. https://www.theedublogger.com/popular-widgets-for-your-blog/